Create an Elective group:
Before adding the elective subjects, an elective group must be created under which the subject can be added. To add an elective group, you must either be the administrator or a privileged employee (Manage Course/Batch or Subject master privilege must be provided).
From the top of your dashboard, navigate to Menu > Academics > Subjects Center.
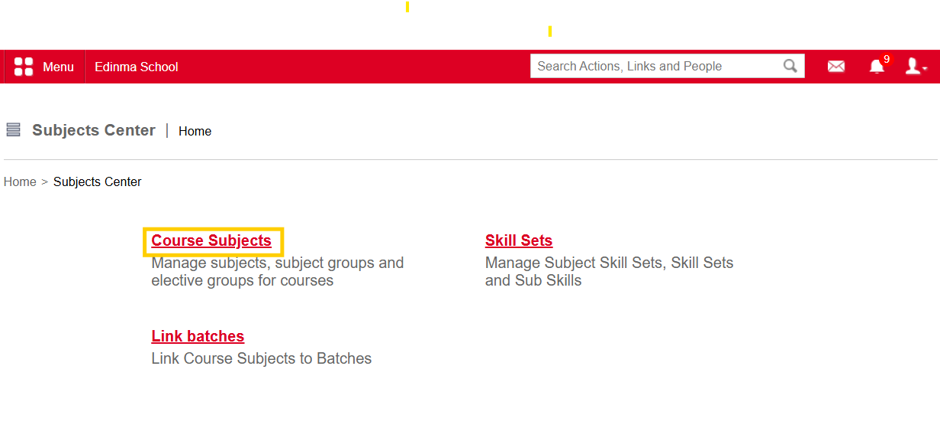
On the next page, select the course to which you want to add an Elective Group, as shown in Figure 2.
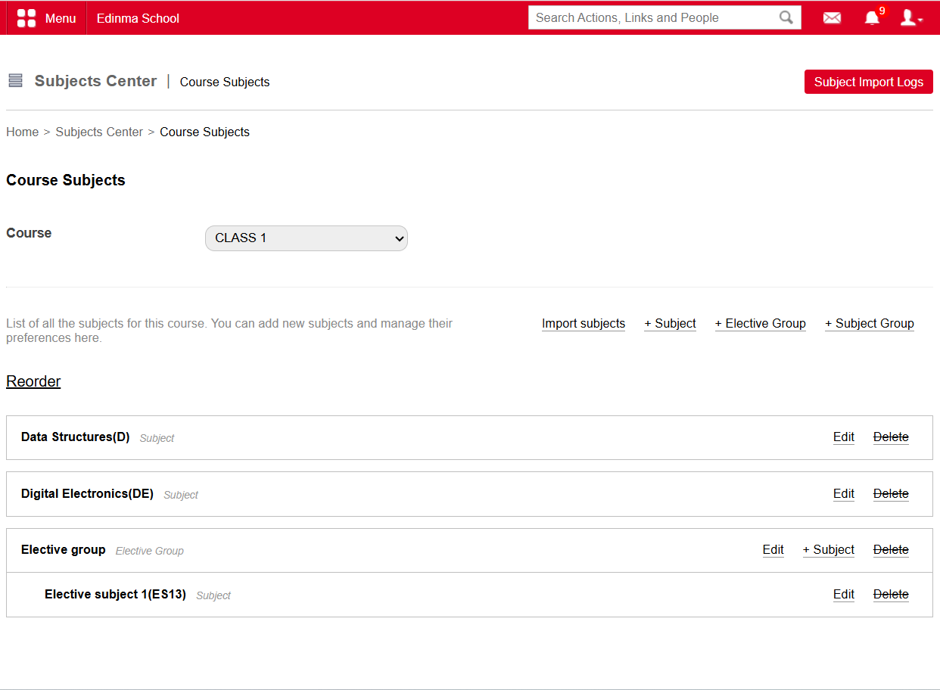
In the next step, click + Elective Group to create an elective group, as shown in Figure 2.
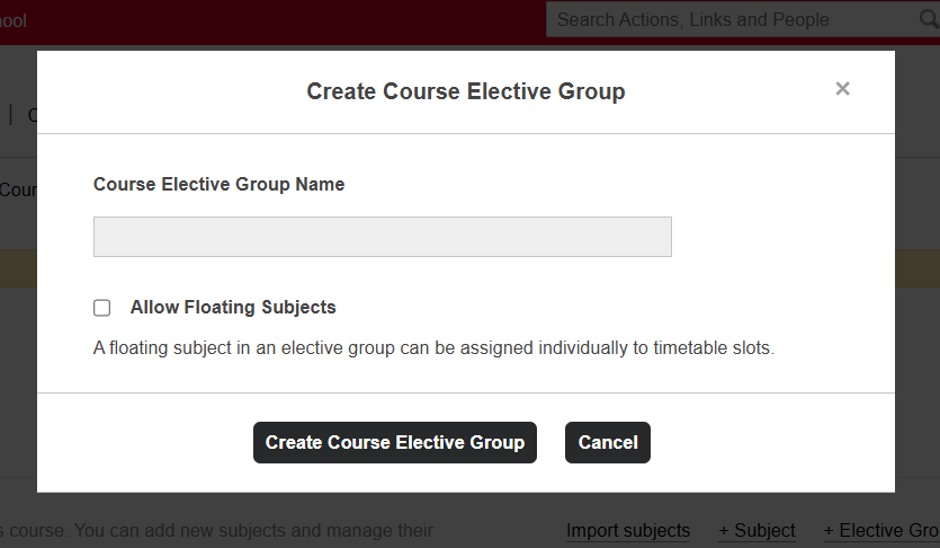
Next, a modal window opens where you can enter the name of the elective group and select the Allow Floating Subjects option, as shown in Figure 3.
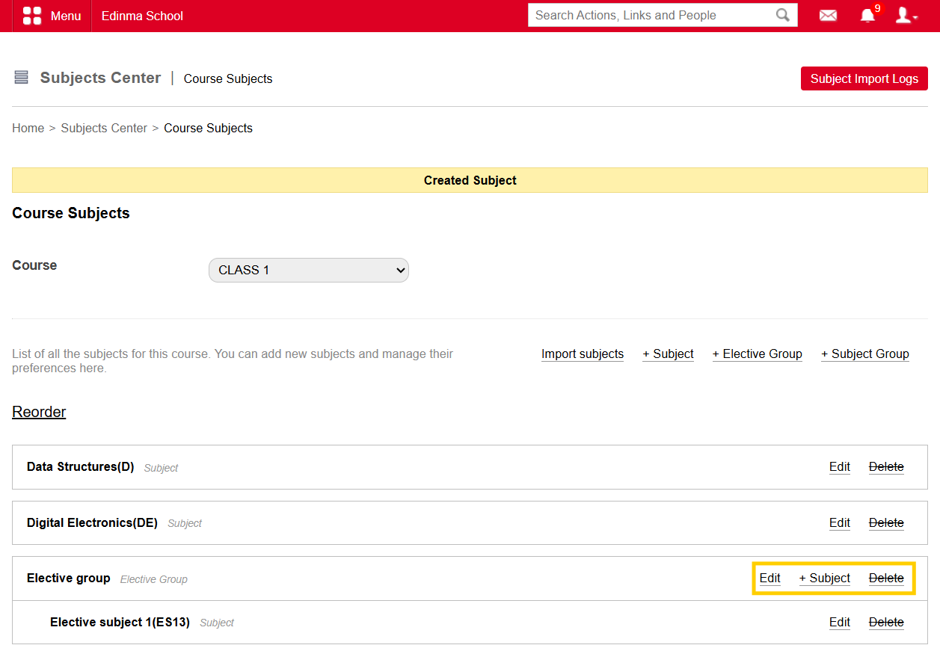
- After creating an elective group, it can be edited or deleted, and subjects can also be added to the group. To edit the elective group, click the Edit option. To delete the elective group, click the Delete option.
- Note: An elective group cannot be deleted unless there are no subjects associated with the group.
How to Create / Edit / Delete elective subject?
To add an elective subject, an Elective Group must be created beforehand and should be available in the portal.
- After creating the elective group, subjects can be added under that elective group, as shown in the figure below.
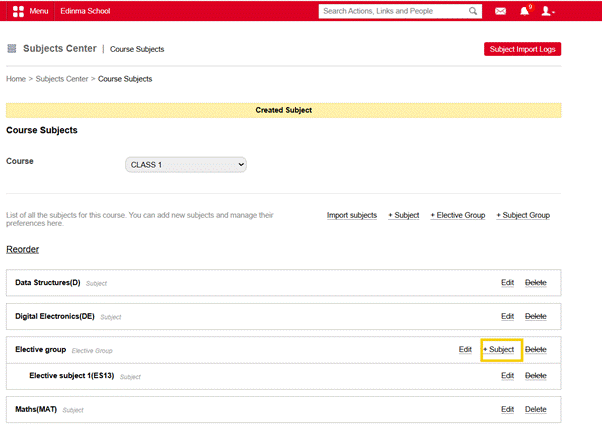
Click + Subject to add an elective subject under the selected elective group.
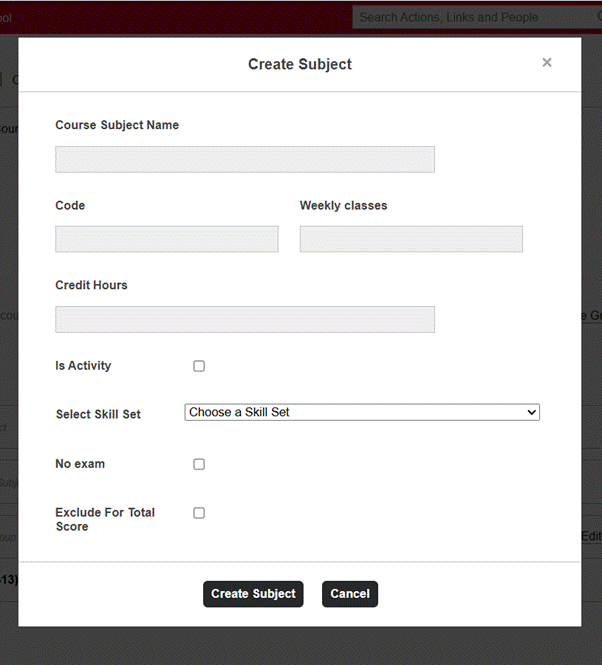
In the Name field, enter the subject name.
- In the Code field, enter the subject code.
- In the Max Weekly Classes field, enter the maximum number of classes the subject can be taught in a week.
- In the Credit Hours field, enter the number of credit hours for the subject.
Note: This field is available only when the grading system for the course is GPA or CWA. - In the Select Skill Set option, choose the appropriate skill set.
- Select the No Exam checkbox if no exams will be conducted for the subject.
- Select Exclude for Total Score if the subject should not be included in the total score.
- Click Create Subject to create the subject.
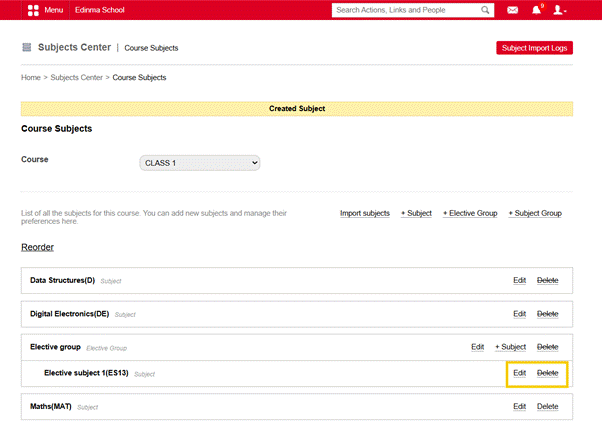
To delete the subject, click the Delete option, as shown in the figure below.
Note: Ensure that the subject has no existing dependencies; otherwise, it cannot be deleted.
Was this article helpful?
That’s Great!
Thank you for your feedback
Sorry! We couldn't be helpful
Thank you for your feedback
Feedback sent
We appreciate your effort and will try to fix the article