The core functionality of this module like creating records/generating pass and approval of pass is handled in mobile app. This module is simple and user-friendly to record and monitor the user entry and also visitor information. All these privileges can manage different actions in this module.
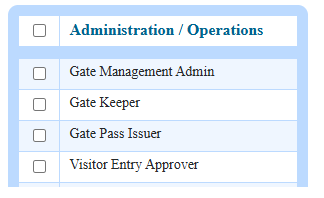
Gate Management Admin :Configures gate management settings, notifications, forms, and reports.
Gate Keeper :Records user entry and exit, manages gate-pass entry/exit, and records visitor details.
Gate Pass Issuer :Handles gate-pass issuance for students and employees.
Visitor Entry Approver : Approves or rejects visitor entry requests.
The 3 main options available in Gate management are:
- User Entry Management
- Gate Pass Management
- Visitor Management
1. User Entry Management
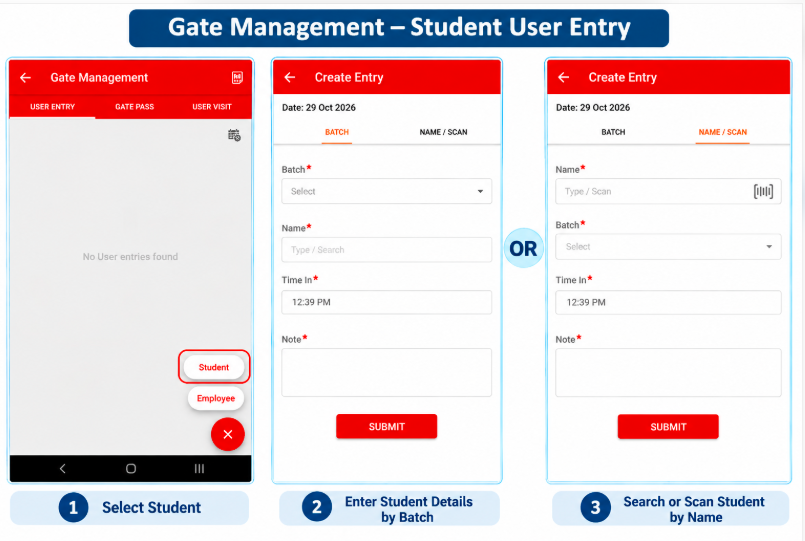
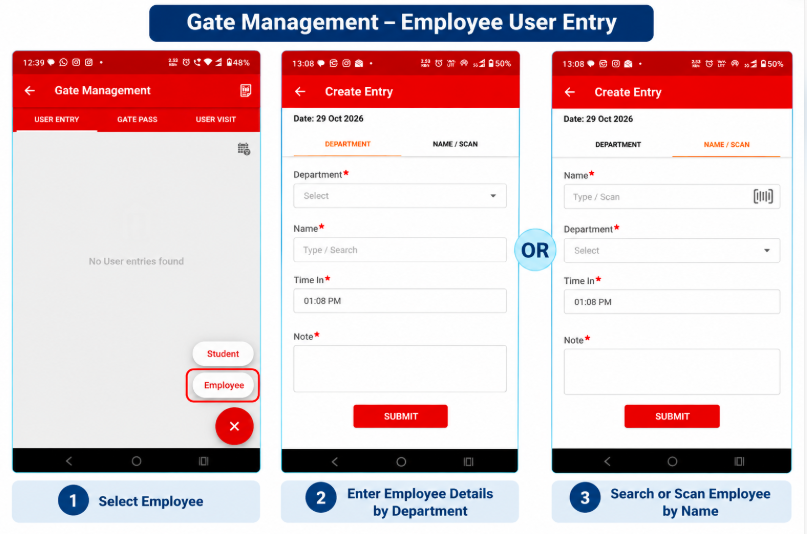
The gate keeper can record the details of the user when they enter the institution premises. The entry can be made from the mobile app with the easy steps. If the user belongs to the institution and has any ID card with barcode, then the barcode can be scanned to fetch the minimum information easily.
Mandatory fields has to be filled:
1.In Batch field: We need to select the batch from dropdown.
2.In Department field: We need to select the department from dropdown.
3.In Name field: We need to enter the student/employee name.
2. Gate Pass Management
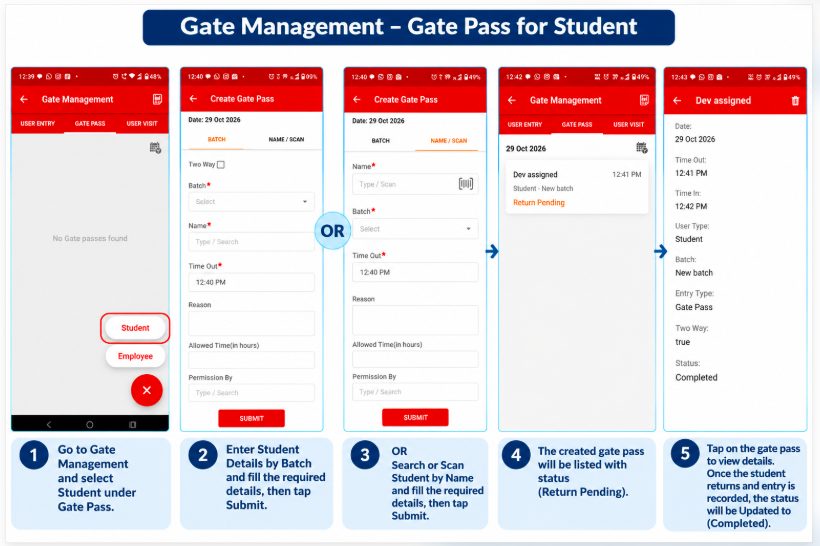
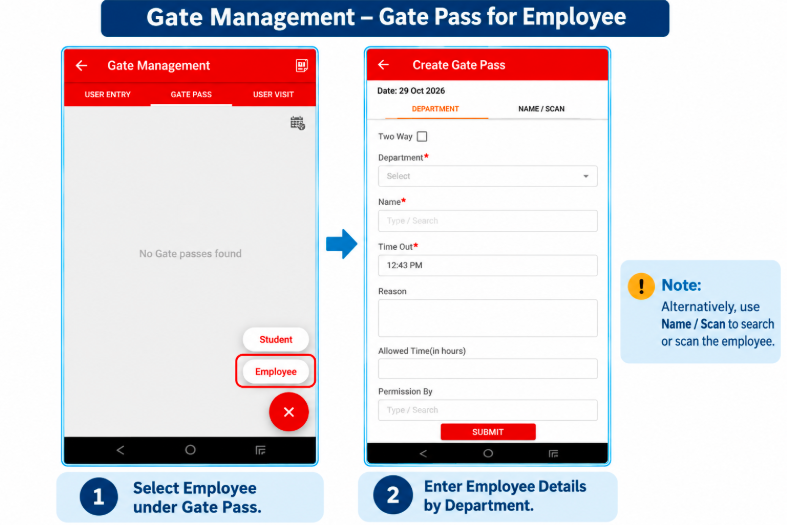
Gate Pass: Allows the users - students and employees to be exited from the institution with appropriate approvals. Along with basic details of the user, permission given by, reason etc are recorded. When issued, a gate pass triggers a notification/SMS. Before exiting the gate, the user with the gatekeeper privilege can update the entry and exit of the user issued the pass.
Mandatory fields must be filled :
- • Two Way checkbox:
- i).If it is enabled the status of the gate pass will be “Return Pending” the privileged employee must update Time In and click on Submit
- ii).If it is disabled, then the gate pass which is created the status will be “Completed”.
- • In Batch field: We need to select the batch from dropdown.
- • In Department field: We need to select the department from dropdown.
- • In Name field: We need to enter the student/employee name.
- • In Time In field: We can adjust the time accordingly.
- • In Note field: We can add any comments in this field.
Click on Submit button for changes to reflect.
Gate Pass for Student:
Gate Pass for Employee:
3. Visitor Management
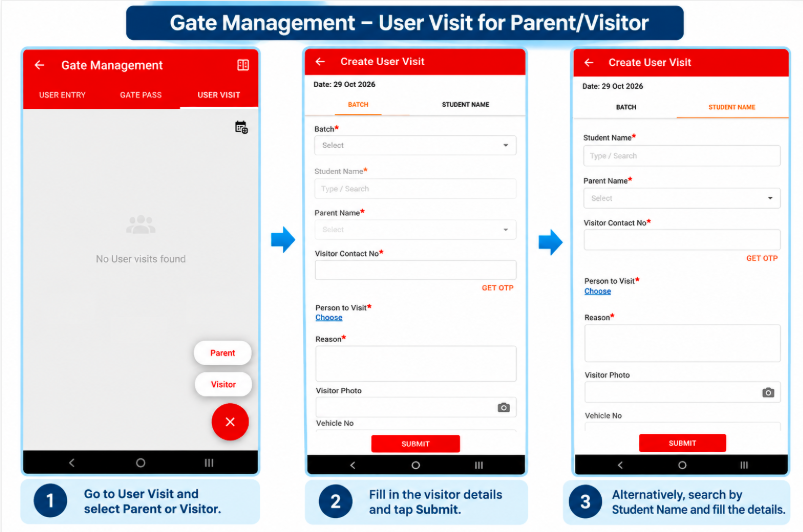
Visitors can be an outside user or a guardian to an existing student in the institution. Visitors basic details are captured in the visitor entry form along with the type - guardian or visitor. The visitor entry is recorded by the user with the gatekeeper privilege. This request notification will be sent to visitee where they can approve/deny the request. Based on the action performed by the visitee the gatekeeper will be allowing the visitor to the institution.
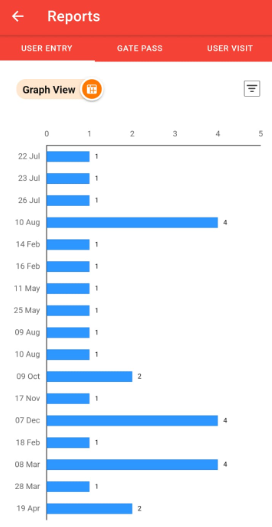
Note: Graphical reports can be generated via Mobile App as well.
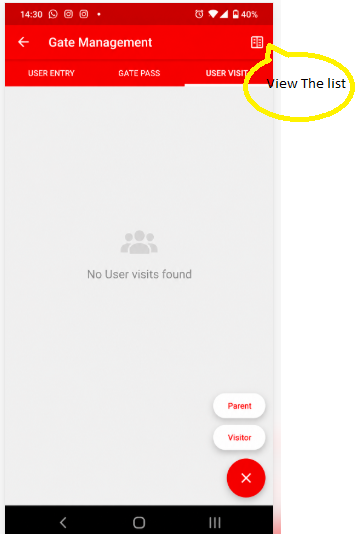
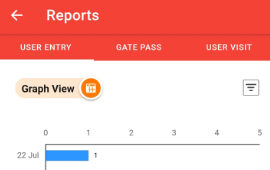
In mobile navigate to Gate Management module and click on the reports icon which is displayed at the top right side of the screen.
Graph view in mobile.
Click on the filter icon which is displayed at the top right side of the screen.
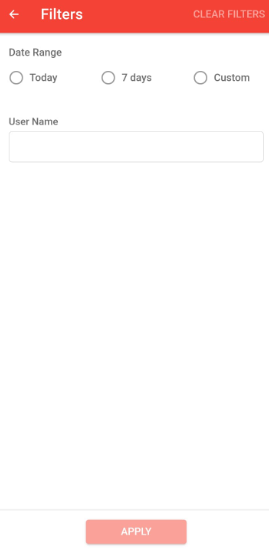
We can filter report according to Date Range namely Today,7 Days and Custom dates.
We can clear the reports displayed by clicking on Clear Filters button which is displayed at the top right side of the screen.
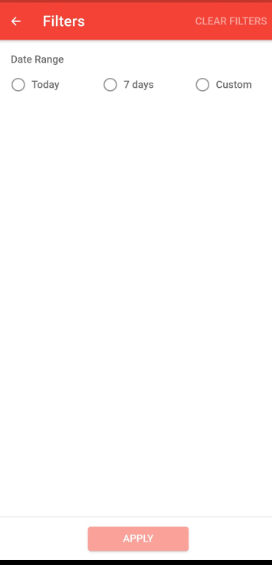
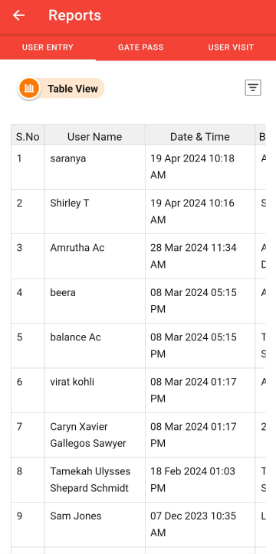
Table view in mobile.
Click on Graph View button which will switch to Table View.
In Table View we can find details like Username, date & time, Batch and User Type.
We can filter report according to Date Range namely Today,7 Days and Custom dates.
We can also fetch user details by providing User Name in the given field.
We can clear the reports displayed by clicking on Clear Filters button which is displayed at the top right side of the screen.
Was this article helpful?
That’s Great!
Thank you for your feedback
Sorry! We couldn't be helpful
Thank you for your feedback
Feedback sent
We appreciate your effort and will try to fix the article